Configuring SCIM
Relevant to the  Expenses Administrators role.
Overview
The automated provisioning of Zetadocs Expenses user accounts can be enabled for Microsoft Entra ID, or other user management systems with a SCIM (System for Cross-domain Identity Management) compliant interface.
The configuration steps detailed in this section refer to creating a connection with Microsoft Entra ID. Please contact our support teams for more information if you are using a different system for managing your users and would like to enable the auto provisioning of user accounts.
Creating the Zetadocs Expenses SCIM Connector (Enterprise Application)
1.Log into Microsoft Entra admin center. |
|||||||||||||||||||||
2.Go to Applications > Enterprise applications. |
|||||||||||||||||||||
3.Choose the +New application button. |
|||||||||||||||||||||
4.Choose the +Create your own application button and select the options as shown below;-
|
|||||||||||||||||||||
5.Choose the Create button and wait for the app. to be created. |
|||||||||||||||||||||
6.Choose Provisioning (left hand side). |
|||||||||||||||||||||
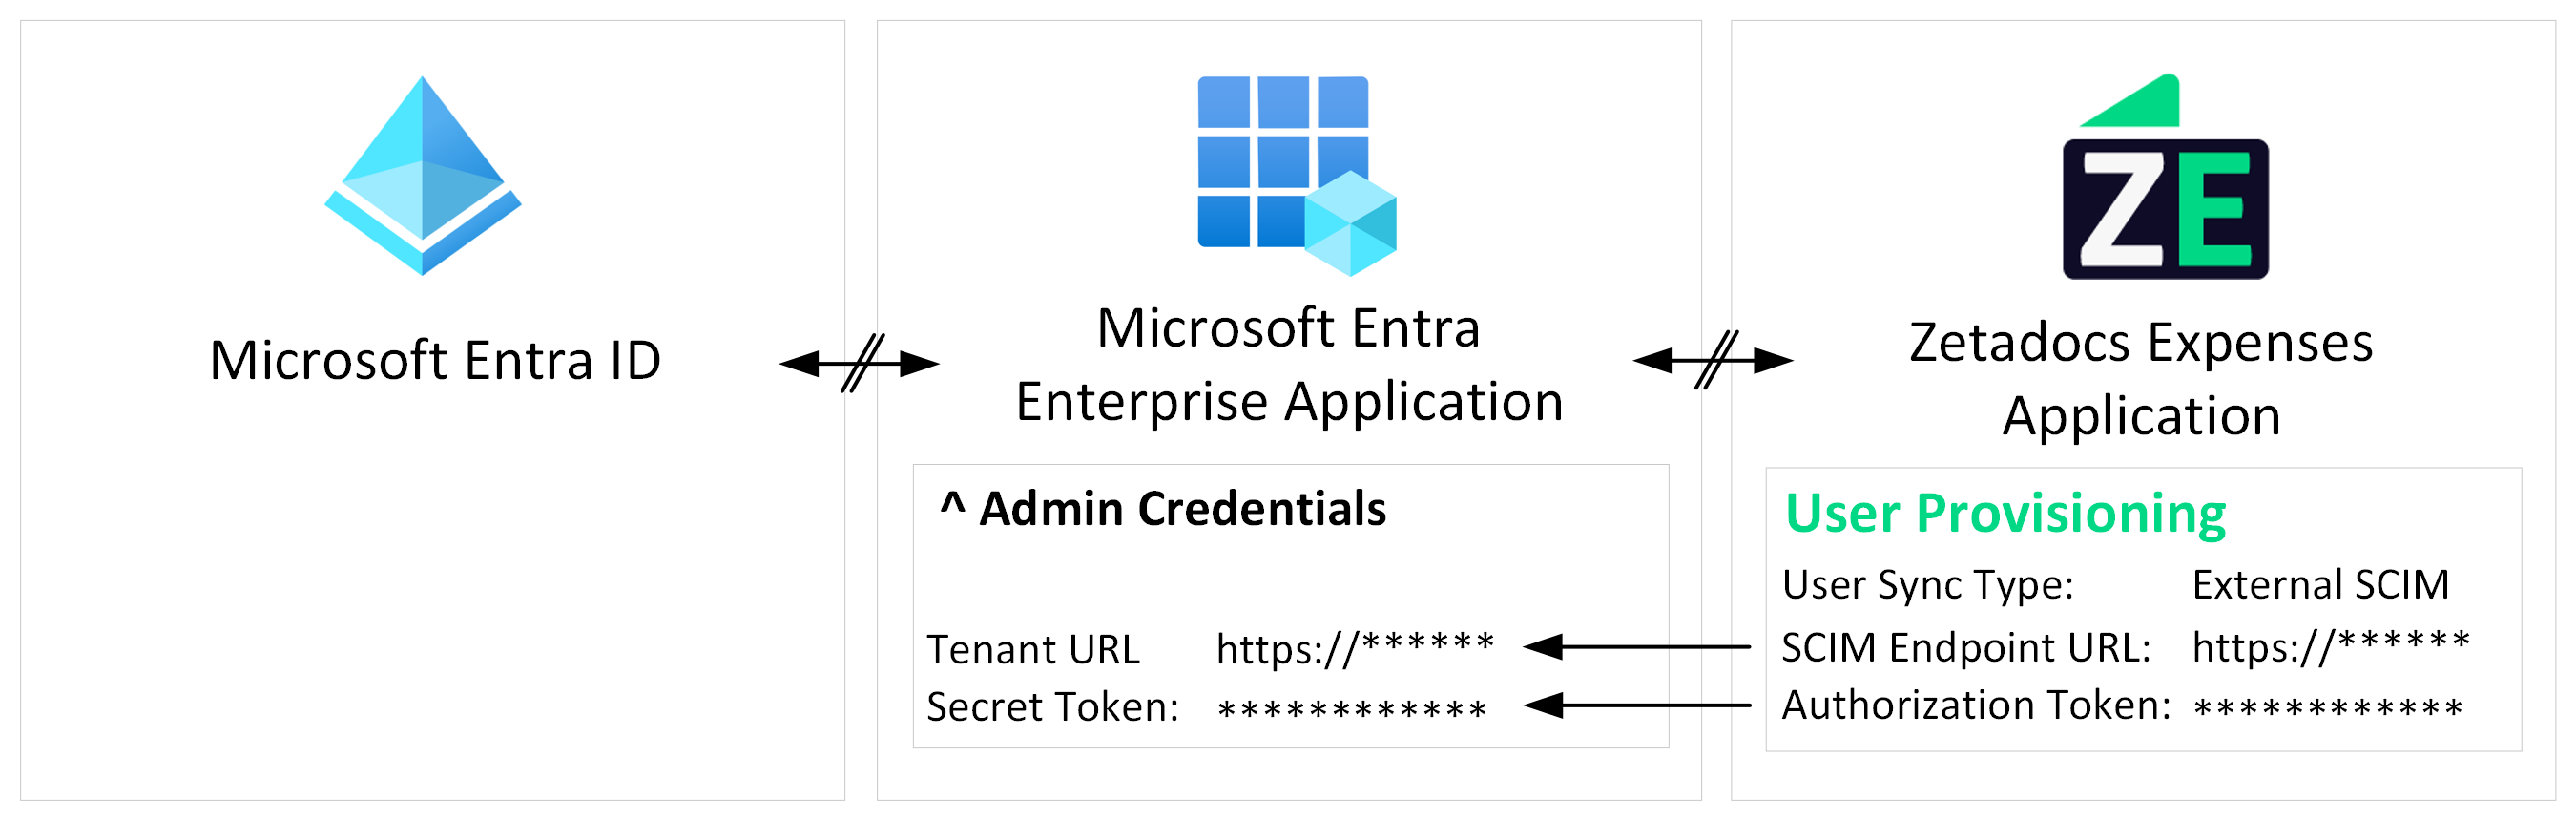
7.Choose the Get started button and enter the configuration options as shown below;- |
|||||||||||||||||||||
|
|||||||||||||||||||||
^ Admin Credentials |
|||||||||||||||||||||
|
|||||||||||||||||||||
8.Choose the Test Connection button. |
|||||||||||||||||||||
9.Choose the Save button (assuming the connection tested successfully). |
|||||||||||||||||||||
10.Go to the Mappings section of the newly created Enterprise application. |
|||||||||||||||||||||
11.Choose the Provision Microsoft Entra ID Groups option and disable it - (only Users can be automatically provisioned). |
|||||||||||||||||||||
12.Choose the Provision Microsoft Entra ID Users option and edit the mappings so that only the 5 attributes listed below |
|||||||||||||||||||||
^ Mappings |
|||||||||||||||||||||
|
|||||||||||||||||||||
13.Choose the Save button. |
|||||||||||||||||||||
You can now choose the Start Provisioning button (shown on the Provisioning Screen). 14.Next, start the provisioning by choosing the Start Provisioning button . This will start the synchronisation process, whereby all 'Active' Entra ID users will have Zetadocs Expenses accounts created for them (if they don’t already have one).
|
